Thursday, February 4, 2010

Plastic Bumpz

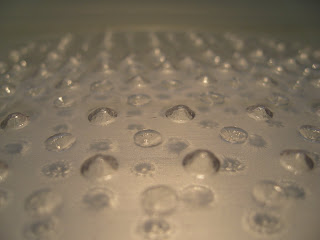
My material is plastic [0.030 PETG] and it is being manipulated/deformed by driving a shaped dowel into the plastic at specific intervals.

As of now, the effect I am attempting to achieve is "unsteady". I also was thinking about "protuberance" (probably not a word), "deformed", and "agitated". If any of these make more sense that "unsteady" or if you have any other ideas that would be extremely helpful.

The "unsteady" effect is manifesting itself through the slight bends of the plastic as it is pounded out as well as the bow that will form in the plastic when is is hung in the curtain wall.

If anyone has any other ways to speed up the process of hitting each of these dimples one by one, that is probably my biggest concern right now.

(sorry for the bad images/backgrounds, I will put better ones up soon)

Profile of the artifact showing the "spring" quality which will hold everything in the curtain wall.


Variation in distance between the ends and the center.


Bending of the plastic through dimple placement.


Close-up of the dimple pattern in the sheet.

Artifact experimenting with dimple patterns and spread.


Current process of gridding plastic sheet and hammering dimples.


Gridded artifact with dimples placed.

Any other comments or suggestions would be much appreciated. (especially any that can spare the ears of everyone who will have to hear my hit 10,000 dimples into a sheet....sorry in advance)

gossamer flashing

The material that I am working with is aluminum, specifically it is rolled flashing.
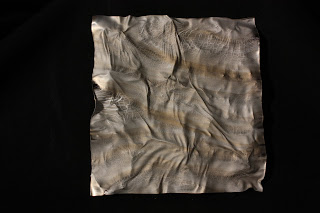
The effect that I am trying to achieve is this thin silk like appearance with varying degrees of tranlucency.

The delicate silk effect achieved by creating a contoured surface with tin foil and then heating the flashing material with a torch and allowing it to drape itself over the tin foil.

The translucency is produced thru a series of micro perforation that appear as the material thins out under heat.

The word that I am using to describe these effects is gossamer- although I don't believe that is entirely accurate- so any suggestions would be appreciated!


deep contours - torch applied to uncoated side of material
shallow contours - torch applied to uncoated side of material
 shallow contours - torch applied to coated side of material
 reverse side of torched panel
 this sample is getting closer to the "gossamer" effect I am pursuing
 look a little closer
 first run at translucency
 second run- getting a little better-
however I need to figure out a better method of capturing this effect in a photo

yes I did take all my pictures with a black background....oops

Aluminum


The above two images are of aluminum foil created by folding and unfolding it. Its dramatic and amazing pattern. Stuck with this option, thinking actual size? how to create impressively and effectively is the main concern?
The lower is "Fire gun on Aluminum sheet which is a interesting egg shell shape, having different sizes of porosity. Difficult to maintain in larger frame.

Crystaline Wax

Wax is an interesting material to play with. When it is melted, it has the consistency and fluidity of water, and is easily pourable. I experimented with pouring the wax over different materials, but my favorite is ice. The wax fills the negative space between the ice-cubes and hardens, creating a structure much like crystals after the ice melts. Placing it in a form allows for larger pours and accentuates the material.

Wax in a cup

Wax with charcoal


A Closeup of the structure


A practice panel


I'm not sure if crystalline is the best descriptor for this, any suggestions?

Stuck in Phase 1


The premier piece still seems to be the emerald glass with Sobo. I have shifted my studies into the Pour-On resin for its strength, quicker drying time, and transparency. The reason I am stuck in phase one is the seemingly one dimensional character of the glass I received from the recylcing plant. The new glass is definitely a mosaic of greens, brown, blue, and clear. This blend gives the glass a stained glass attitude. As I move forward I am looking to give the effect a second layer. I need to explore this second layer quickly (for obvious reasons) and hope another latent quality reveals itself through larger scale testing.

More to come!

Spackle Extrusion


My first post from the numerous iterations exploring spackle. The first image below is one of a series of five artifacts to study how varying the coil density effects the panel. The spackle for these images has been mixed with water to make it less dense, then it is squirted through a icing "bag" for pastries.

This image is take looking through the spackle panel placed in a window. The day is fairly overcast, but some great contrast/lighting effects are produced.


Edited black and white of the panel in a window.


My next move is to explore varying depth of the coils to understand where the panel ceases being transparent and translucent.


And a note to anyone exploring the properties of spackle in the future.... do not put it in the microwave.

Experimenting with larger and larger coil diameter yielded a more "contrived" appearance. Small, tight loops seem to provide a natural and flowing look to the spackle.
Question: Would you rather see the panel have opaque areas where the spackle is very thick and blocks daylight, or allow for a play of translucence and transparency across the panel?

Wednesday, February 3, 2010

Fluid Glass


I started with this one, with idea of being able to capture the latent quality of glass shattering. Then trying to bend the glass to transform it to give a quality not usually associated with glass.


This is an image of the opposite side of the glass cover with clear tape, for support.


This one I was experimenting with color. This one has hot glue on the back, holding it together.


These was a test on a larger sheet of glass. Closer to the size of the final piece. The process I use to create it, is a layer of clear tape on the back of the sheet of glass before breaking it, then I break it, with a tool. Which I am now in the process of seeing how different tools make the glass shatter in different patterns. Then I bend it into the shape, being held to the limitations of where the glass shatters. Then add a layer of a gel medium, I have found works the best to hold the piece together.
I would be interested to know what qualities this evokes in you? The one I have come up with so far is FLUID.


Tuesday, February 2, 2010


after about a billion iterations on what to do with wax I think that I have decided on this one. Originally, as an accident (me spilling and then trying to wipe up a bunch of hot wax with a paper towel) the delicate translucent nature of wax really comes through when it freezes a 1-ply piece of toilet paper in time. I found that the irregular nature of the edge was the most interesting part and it also creates the most depth in light and shadows when put up to the window. Do I play with colored tissue paper too?

Monday, February 1, 2010

Mies Quote

"Architecture starts when you carefully put two bricks together. There it begins."
-Mies

Do you think there is a link between the materials research we are currently doing and this quote from Mies?

Whats happening in tokyo.

"Behold Tokyo's New Augmented Reality Architecture"

Were all probably wondering why is this special? While I was in Tokyo I ran into alot of receipts and coupons that had these symbols on it. after asking one of the students I found out that if you take a picture of it on your cellphone the service will send you back deals and information or games! pretty crazy right?

N Building from Alexander Reeder on Vimeo.


heres the link to where I found it

Sunday, January 31, 2010

First post of the semester (Microcosm Spring 2010)

I have started having issues with Spackling....how troublesome the material assigned to me....I started out forming it through presses, and after seeing a previous example done a year and a half ago I decided to avoid extruding Spackle.

The question that I decided to focus on was "how can Spackle hold light?" (its a window installation after all) I have noticed is that when Spackle is thin enough, it can glow when the light hits it. The light then also shows imperfections in the Spackle compound I have created.

here are some images from my testing phase.


Saturday, November 7, 2009

Preliminary Thoughts on Microcosm Studio 2010

The first principle of the Microcosm Studio is: Design should always start with materials. This often strikes students as a strange dictum for a studio committed to aggressive experimentation with digital tools. How are these two aspects reconciled? After all, the digital and the material are fundamentally different, right? Many students assume that if digital tools play a significant role in a designer’s thinking, then design becomes formalistic, visually driven, and detached from the material realities of building construction. That is to say, to whatever extent one embraces the digital, then to the same extent one necessarily loses touch with the material. This assumption too often proves true in schools of architecture, as students use the glossy imagery of digital simulation to substitute for real understanding of how a design is made and inhabited. The Microcosm studio rejects the idea that computers necessarily cast designers into a fantasy world, and instead, it holds that computers grant powerful new control over material reality, when they are wielded properly.

In the conventional (non-Microcosm) approach, digital design starts with a formal idea (i.e., a parti) or some other kind of geometry, which is tested visually through various simulations (e.g., models, renderings) before finally being constructed out of materials. The dominant flow is from digital to material. The digital is formative, while the material is conclusive. Microcosm reverses this flow, moving instead from material to digital. Through hands-on experimentation with materials and through the iterative fabrication of prototypes, designers find new creative potential in materials that inspires formal ideas. Armed with this insight, designers then encode a material’s interesting properties and behaviors, using this information to generate and explore digital simulations. Insight gained from this second wave of experiments then facilitates the fabrication of more prototypes. The flow becomes an iterative cycle from material to digital and back to material again.

The project sequence for this year’s studio reveals that Microcosm is grounded in materials research, prototyping and a careful consideration of the interaction between material systems and human inhabitants. Digital tools are engaged intensely in this effort, but the question is how to engage digital tools competitively and to our fullest advantage as we reshape the material world.

Project 1: PANEL

The first project introduces students to a method of materials research and prototyping. The final product is a full-scale prototype of one panel for a proposed curtainwall shading system.

Project 2: JIG

In the second project students learn how to extend the exploration of materials into the digital medium, using parametric thinking and mass-customization to augment understanding and creative control of materials. The final product is a large-scale model representing a design for a pedestrian bridge across a forested gorge in Grant Park on the south side of Milwaukee, which will replace a deteriorating existing bridge.

Project 3: LOW-TECH

Armed with a new set of principles and methods from the first two projects, students will tackle an expanded version of the challenge presented in Project Two. They will explore the creative potential of a cheap, off-the-shelf building system such as aluminum siding, electrical conduit or wood stud framing. Through creative materials research, iterative prototyping and parametric analysis, they will transform a banal, low-tech building system into an innovative ceiling or partition system. The final product is a full-scale ceiling or partition prototype. Because it is made out of cheap "Home Depot" materials, the cost of the prototype will be comparable to the kind of pristine basswood model students often make in a conventional studio, yet these seemingly ordinary "Home Depot" materials will be transformed into a customized, exotic, compelling, architectural organism.

Project 4: HABITATION

The first three projects focus on materials, building systems and the hands-on making of architectural fragments: panel, structure, ceiling, and wall. Project four shifts the focus from materials to space, asking questions about how people inhabit and experience buildings, and how designers can deploy material systems to offer meaningful habitation. The scale also increases to that of an entire building with multiple building systems and a program of spaces to be resolved on a real site. (The details of the program and site will be revealed later.)

Friday, November 6, 2009

Pike Loop


Went to the opening night for this project last week when I was in New York with Gil's IP/BIM studio. The wall is called Pike Loop- a site specific installation designed by Gramazio & Kohler Architecture and Digital Fabrication, sponsored by Storefront for Art & Architecture. It was built by an industrial robotic arm housed in a shipping container on the back of a flatbed truck. It took 4 weeks to complete and used more than 7,000 bricks (attached with epoxy).


Thursday, November 5, 2009

Aggitation!

http://www.c-lab.columbia.edu/0005.html

Wednesday, October 28, 2009

Mobile Mass Customization


building blog article
http://bldgblog.blogspot.com/2009/10/robotism-or-golden-arm-of-architecture.html

storefront/video
http://www.storefrontnews.org/exhib_dete.php?exID=152